Summiting Mt. St. Helens


Looking east along the crater rim of Mt. St. Helens to Mt. Adams in the distance.
Of all the volcanoes in the northern Cascades, Mt. St. Helens is by far the easiest to climb. For starters, the most common route, Monitor Ridge on the south flank, is non-technical, eliminating the need for specialized gear or advanced mountaineering skills. At just 8,366 feet, its summit elevation post-1980 eruption places it several thousand feet lower than neighbors such as Mt. Adams, Mt. Baker, and Mt. Rainier, essentially taking the ill effects of altitude out of the equation. However, at 10 miles round trip and with about 5,000 feet of elevation gain, it’s still a robust day hike.
After numerous trips to the base of Mt. St. Helens over the years, reaching the summit of this active volcano has long been on my to-do list. When we moved back to Washington last summer, I knew I might finally get my chance. The Gifford Pinchot National Forest limits the number of climbers to 100 per day in the summer months, and the permits sell out quickly when they go on sale in March. Sadly, I missed the initial sale this year, leaving me to obsessively check every few days for cancellations. Eventually I got lucky and spotted two permits up for grabs in late-July. A few minutes later, they were mine.
From a distance and elevation gain standpoint, the hike up Monitor Ridge is comparable to many of Colorado’s famous “Fourteeners”. One major difference: on Mt. St. Helens we would be topping out at a lower elevation than one starts most Fourteener climbs at. The other big difference would be the terrain. Most Fourteeners have a fairly distinct path a good way up the mountain and are on reasonably solid rock (my dislike of exposure and falling means I haven’t done any of the ones on rotten rock). On Mt. St. Helens, after a brief foray through the forest, the climb traverses a mixture of large lava boulders and a loose scree consisting of pumice and volcanic ash. This is a hike where a mask was on the suggested gear list before they were cool!
To the hike! As the National Weather Service had accurately predicted several days in advance, the morning of our climb dawned with some fairly dense fog at the Climbers Bivouac trailhead where we had camped the previous night. We hit the trail at 6:00 am, anticipating that it would take us 4-5 hours to reach the summit. The first two miles of trail climbs gently through a moist and somewhat unremarkable second growth forest. At timberline is where the route changes from a well-maintained trail to the aforementioned scree and boulder scramble. Wooden posts serve as guides for the remainder of the climb, but following them too closely didn’t always make for the most sensible route. In places there is a fairly obvious path, while in others (particularly in the boulder fields), you just sort of have to find what works best. Just before arriving at timberline, we began to emerge from the clouds, revealing views of Mt. Adams to the east and the extremely conical Mt. Hood to the south that we enjoyed the rest of the day. Once above the trees, our pace slowed significantly, but before too long we were several hundred feet above the cloud deck we had been immersed in a short time earlier:

Breaking out of the trees on the Monitor Ridge route.

Heading up Mt. St. Helens with the clouds below us and Mt. Hood in the background.

Nearing the top of the boulder field on the Monitor Ridge route. Only a mile to go!
We made fairly good time through the ~2 miles of boulder fields. The final mile through a deep and loose mixture of volcanic ash and pumice was definitely the most challenging part of the hike. With masks on to prevent inhaling clouds of ash kicked up by our feet (and the wind), it was somewhat analogous to hiking up a sand dune: two steps forward, one step back, repeat. After about four hours, we were standing on the crater rim.
The first view northward into the bowels of Mt. St. Helens was stunning, and definitely one of the most dramatic viewpoints I can recall. Unlike many lesser peaks in the Cascades, or most peaks in the Rockies, where you are often surrounded by other peaks of comparable elevation, Mt. St. Helens stands alone. On this volcano, you are standing on what is, by far, the highest point for dozens of miles in any direction, with only the other volcanoes exceeding you in height. Looking down onto the crater formed by the 1980 eruption, the lava domes that are slowly rebuilding the summit, and the Crater Glacier (one of the few alpine glaciers in the world that is actually advancing) was spectacular. Cornices of hard-packed, dirty snow clung to the nearly vertical slopes of the crater walls just beneath our feet, necessitating caution as we moved our way along the rim. Gentle puffs of steam were visible on portions of the lava dome, a gentle reminder that we were standing at the summit of one of the most active volcanoes in the world. The dull roar of rock and ice fall from the crater walls was nearly constant for the hour we spent taking in the view from the summit.

Panorama from the Mt. St. Helens crater rim, looking north across the lava dome and Crater Glacier to Spirit Lake and Mt. Rainier. (Click image to enlarge)

Panorama looking south from the crater rim. Mt. Adams at left, Mt. Hood just left of center. (Click image to enlarge)

Clouds part to reveal Spirit Lake and the distant cone of Mt. Rainier, more than 4,000 feet higher that Mt. St. Helens.
While the hike up had been relatively uneventful, the journey down was definitely less pleasant. Hiking poles are a must for the descent due to the steep, loose, and rocky terrain. This is definitely one of those hikes where coming down is exponentially more difficult than going up!
Compared to our experience hiking Fourteeners in Colorado, the significantly lower elevation of this hike makes a huge difference and in my opinion dramatically lowers the overall difficultly of this route. There is a big difference between inching your way up a scree slope at 13,000′ and having to stop every few steps to take in oxygen, and doing the same at 8,000′ where breathing isn’t as much of an issue. While the terrain was definitely more difficult than your average hike with similar specs, in the end we felt like the difficulty of the Monitor Ridge route was somewhat over-hyped based on some of the accounts we read in advance. We wouldn’t hesitate to do it again. As far as special gear, a mask was definitely helpful for both COVID and volcanic ash purposes. Hiking poles were more or less useless on the way up, as the boulder fields often required the use of hands to navigate, but essential on the way down. Other sources recommended bringing garden gloves to protect against cuts on the sharp volcanic rocks. We bought some cheap ones and definitely found them useful. I never actually put mine on during the ascent, and made it to the summit with only one small abrasion on the back of my hand. Long pants are also a must if you don’t want your lower legs ripped to shreds by the rocks.
With Mt. St. Helens checked off, next up on the to-do list is Mt. Adams, which is also a non-technical climb at the right time of year, albeit longer. We may not get to that one this summer…perhaps our goal will be to climb one Cascade volcano per year!
Mt. Adams, Mosquitoes, and the Milky Way


Bright Jupiter rises above the summit of Mt. Adams, with the summer Milky Way reflected in the calm surface of Takhlakh Lake, Gifford Pinchot National Forest, Washington.
Mt. Adams is a striking feature of the western skyline from here in the Yakima Valley of Central Washington. Here’s what it looked like from our neighborhood at sunrise a few months back:
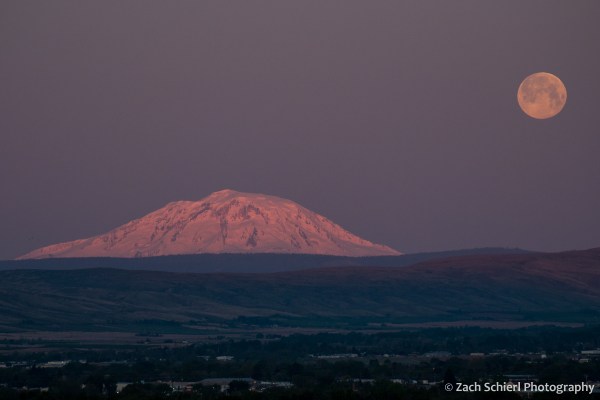
A setting full moon and sunrise light on Mt. Adams as seen from the Yakima Valley.
The towering volcanic cone looks close enough to touch, but in reality, reaching the base of Washington’s second highest peak requires a nearly three hour drive down a labyrinth of Forest Service roads. We’ve been wanting to explore the Mt. Adams area since we returned to Washington last year. With winter’s grip beginning to ease in the higher elevations of the Cascades, earlier this week we finally got the chance.
Mostly clear skies, calm wind, and a dark moon made for some great photo opportunities. While it may be debatable, I think some of these were worth their weight in mosquito bites. Several small ponds dot the lower flanks of Mt. Adams and snowdrifts still lingered in the shadier patches of forest, making the entire landscape somewhat damp. Consequently, the mosquitoes were ferocious! Sadly, our mosquito “repellent” only seemed to attract more. I was quickly reminded that a vastly underrated aspect of living in the southwest is the lack of bugs!

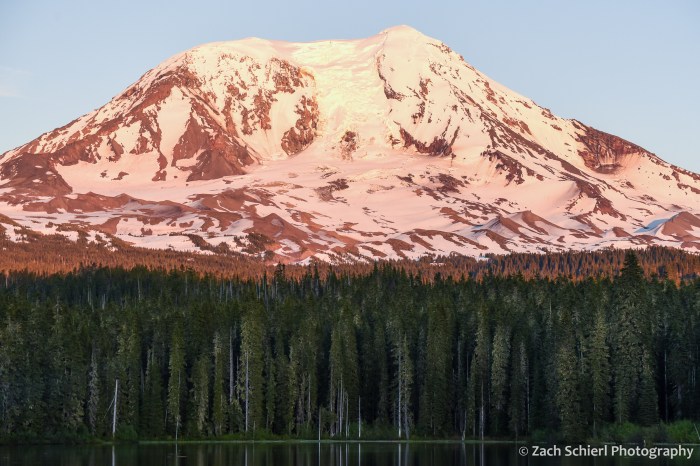
Mt. Adams reflected in Takhlakh Lake, Gifford Pinchot National Forest, Washington. (Not pictured: immense swarms of mosquitoes.)
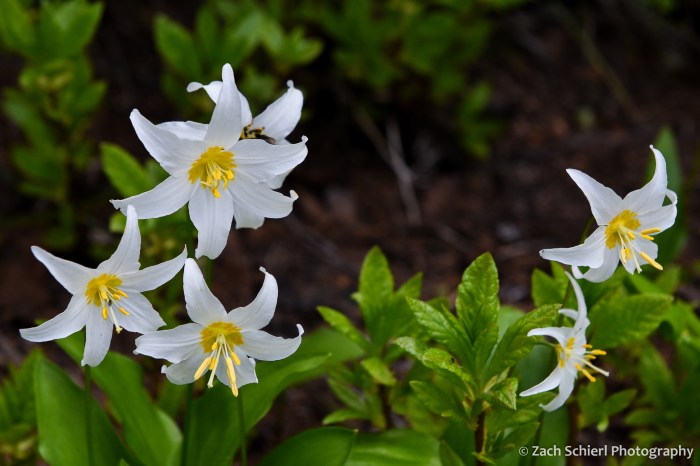
White avalanche lily (Erythronium montanum), one of the first wildflowers to emerge from the swampy ground as the snow melts away.

Mt. Adams reflected in Takhlakh Lake at sunset.
The forests just to the west of Mt. Adams happen to be located nearly in the center of the four large active stratovolcanoes of the south Cascades: Mt. Adams, Mt. Rainier to the north, Mt. St. Helens to the west, and Mt. Hood just across the Columbia River to the south in Oregon. A variety of relatively short but steep hikes in the area ascend lesser peaks, resulting in fantastic views of all four volcanoes, plus the dense forests of the Cascades:
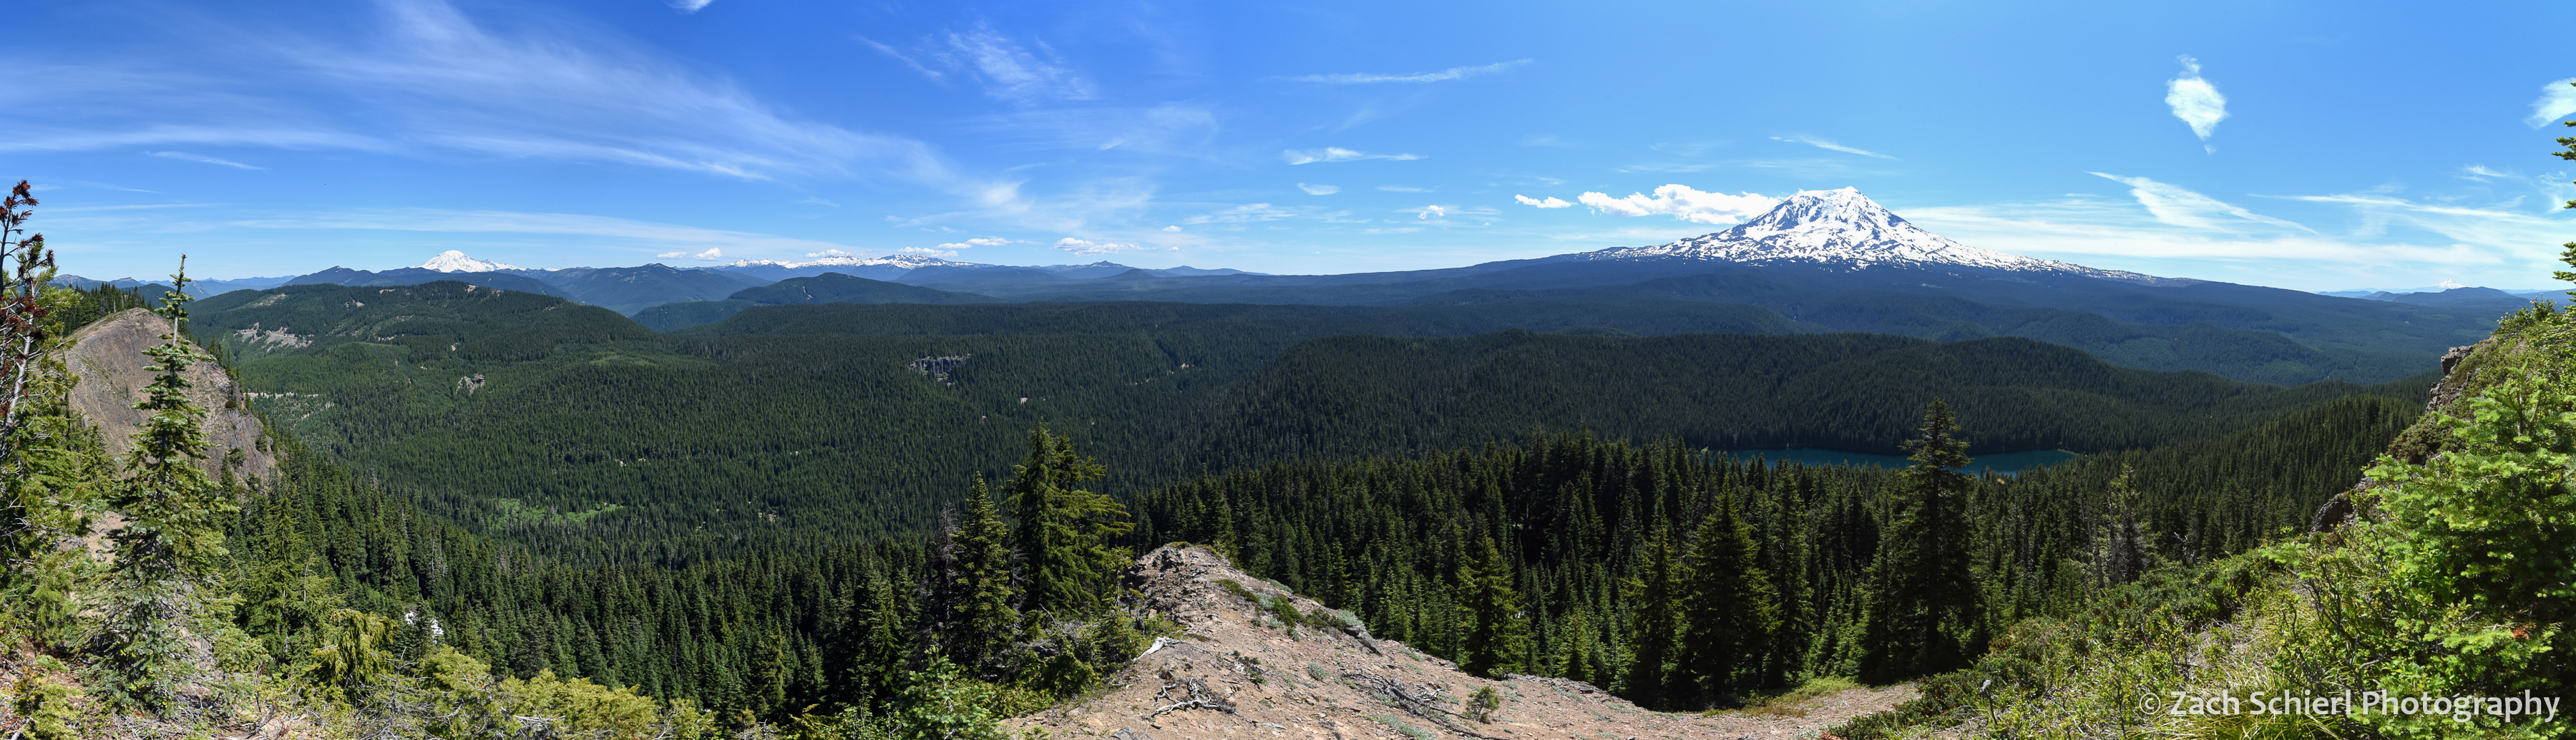
Panorama from Council Bluffs. Three Cascade Range stratovolcanoes (and the remains of a fourth) are visible (click to enlarge): Mt. Rainier (far left), the remains of the Goat Rocks volcano (center left), Mt. Adams (right), and Mt. Hood (far right). The upper portion of Mt. St. Helens’ eviscerated cone was also visible through the trees to the west.

The dense forests on the west flanks of Mt. Adams. Council Lake at bottom.
The real fun came after nightfall. Dark skies are much harder to find in Washington than in Utah, and this was my first good look at the Milky Way since last summer. The calm weather allowed me to capture the Milky Way’s reflection in Takhlakh Lake. Jupiter was kind enough to rise directly above the summit of Mt. Adams. And I got lucky and captured the brightest meteor of the evening in one exposure. This was certainly a case of being in the right place at the right time! (One might argue that the “right time” would have been a few months from now, when all the mosquitoes are dead, but then the Milky Way would not have been positioned so perfectly.)

A meteor takes aim at Jupiter as Mt. Adams and the Milky Way are reflected in Takhlakh Lake.

The Milky Way begins to emerge from evening twilight.
The Best Day Hike in the World
At least that how the Kiwi’s promote the Tongariro Alpine Crossing in Tongariro National Park. Given that I haven’t expereinced the vast majority of the day hikes in the world, I am not in a position to judge the accuracy of such a statement, however after last week I can say with certainity that you would have a very difficult time arguing against them.
The Tongariro Crossing is located in the central portion of Tongariro National Park, New Zealand’s oldest. The 19.4 km (12.0 mile) track climbs up and over a saddle between Mt. Ngauruhoe and Mt. Tongariro, two active stratovolcanoes that along with Mt. Ruapehu form the backbone of the national park and are the highest points on the North Island of New Zealand. If there is one thing that the trail is known for, it’s bad weather. The trail had been closed for most of the week that we were on the North Island due to snow and 120+ km/hr winds but on the last day of the trip, the clouds parted, the winds moved on, and we had 100% perfect weather for the entire day.
Undertaking the Crossing involves taking a shuttle bus to a trailhead on the west side of the mountains. 19.4 km later, the bus picks you up on the north side and drives you back to the carpark. From the very beginning, the landscape is incredibly stark, with almost no vegetation. Mt. Ngauruhoe (which played the role of Mt. Doom/Mordor in the Lord of the Rings Trilogy) looms above you for the entire first half of the hike. In many ways, the landscape is similar to what you would experience hiking across the flanks of Kilauea or Mauna Loa in Hawaii only much more mountainous. All three of the volcanoes in the part have expereinced significant eruptions in the last few decades and the trail crosses a number of fresh lava flows, pyroclastic deposits, craters, and steaming ground.
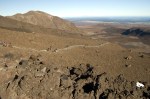
The trail begins by slowly climbing up a broad glacial valley on the western flank of the mountains. After about 8 kilometers and a 750m (2500 ft) climb up Devil’s Staircase (brief side rant: “Devil’s” is an prefix used FAR too often when it comes to naming moderately challenging sections of trail. Go hiking anywhere in the world and I promise you you will encounter a difficult section of trail named Devil’s Staircase, Devils’s Highway, Devil’s Ladder, or Camino del Diablo or something like that. I really want to know how these conversations go. “Ooh, this here trail is pretty steep…what should we call it?” “I dunno, whatever we call it though we should probably slap “Devil’s” on the front of it to make it sound nice and foreboding.” I mean, I get that its steep and you might be a little winded when you reach the summit, but in all honesty, unless you are trying to climb Everest in 120 degree heat with no oxygen, I have a feeling the Devil could assign you far more hellish tasks.) , we arrived at Red Crater, the highest point on the main trail. Side trails split off the main route and head to the summits of Mt. Ngauruhoe and Mt. Tongariro. Since we had gotten a late start, we chose Mt. Tongariro since it was shorter and didn’t involve scrambling up a 45 degree scree slope. The views from the top were breathtaking, one could see almost from one coast of the island to the other. After Red Crater, the trail descends sharply down to Emerald Lakes past a number of hydrothermal vents and pools and lots of steaming ground. The second half of the trail basically just heads straight down the mountain and is relatively unremarkable. We ended up running the last few km’s in order to catch the 3:30 bus back to our car and not have to wait for a hour to catch the next one.
All in all, an amazing hike, especially for the geologically inclined. My only complaint were the hundreds of other people we shared the trail with. This was to be expected I suppose given that this was the first day in a week that the trail had actually been passable but it was still far from what you would call a wilderness experience. Despite the length and elevation gain, the crossing is not a particularly difficult trail. With the exception of one stretch just after Red Crater, the trail is incredibly well maintained and the footing is superb. We manged to complete the trail in exactly 7 hours including our side trip to Tongariro Summit.
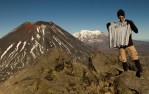
-
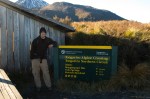
- Yours truly at the trailhead
-
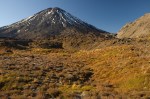
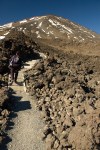
- Looking up towards Mt. Ngauruhoe from the beginning of the Tongariro Alpine Crossing
-
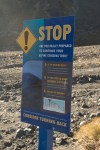
- The DOC makes a BIG effort to make sure that people attempting this trail are prepared and have the right equipment. In fact, a few years back, they actually changed the official name of the trail from “Tongariro Crossing” to “Tongariro Alpine Crossing” in an attempt to make the trail sound more inhospitable to novice hikers.
-
- Trekking across Mordor…
-
- Devil’s Staircase, Tongariro Alpine Crossing
-

- Needle ice on Mt. Tongariro
-

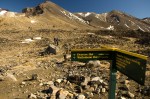
- Layered, hydrothermally altered volcanic deposits dot the foreground, Mt. Ngarahoe visible in the background from Mt. Tongariro
-

- Early season snow on Ngauruhoe, as seen from Red Crater
-
- Trail Junction on the Tongariro Alpine Crossing
-
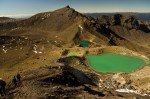
- Emerald Lakes on the Tongariro Alpine Crossing
-

- A distant, hazy view of Mt. Taranaki (all the way on the west coast of the North Island) from the summit of Mt. Tongariro
-
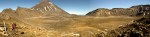
- Panorama of South Crater between Mt. Ngauruhoe and Mt. Tongariro
-
- Represent!!!
